EASY Mediterranean Eggplant Salad

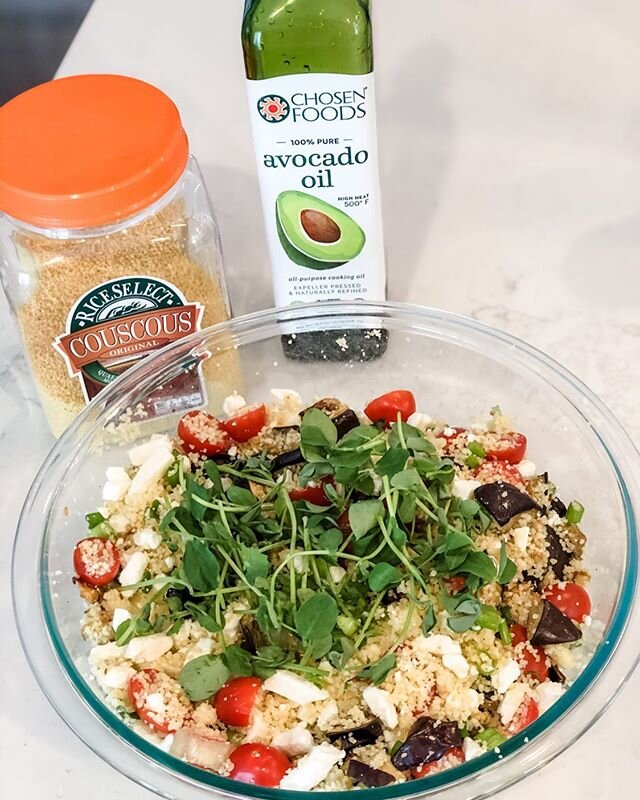
Spring is here and so are SALADS! No, I’m not talking about ones only filled with leafy greens, but instead grain salads which can be packed with just as many nutrients and can be added to liven up your leafy greens or featured at your next potluck. This Mediterranean Eggplant Salad has become a staple in our house and was inspired by the homemade kitchen of a healthy deli and cafe that gave me my first job at 14! I learned so much about cooking from working there (something I am FOREVER grateful for) and I’m so excited to be sharing one of my favorite dishes from there. It’s light, packed with flavor and protein and even though I still can’t make it quite as good as they used to, I like to think this version is pretty close!

IMG_3652.jpeg

*My posts may contain affiliate links and/or commission links which means that I make a small commission from sales generated through my page at NO COST TO YOU.
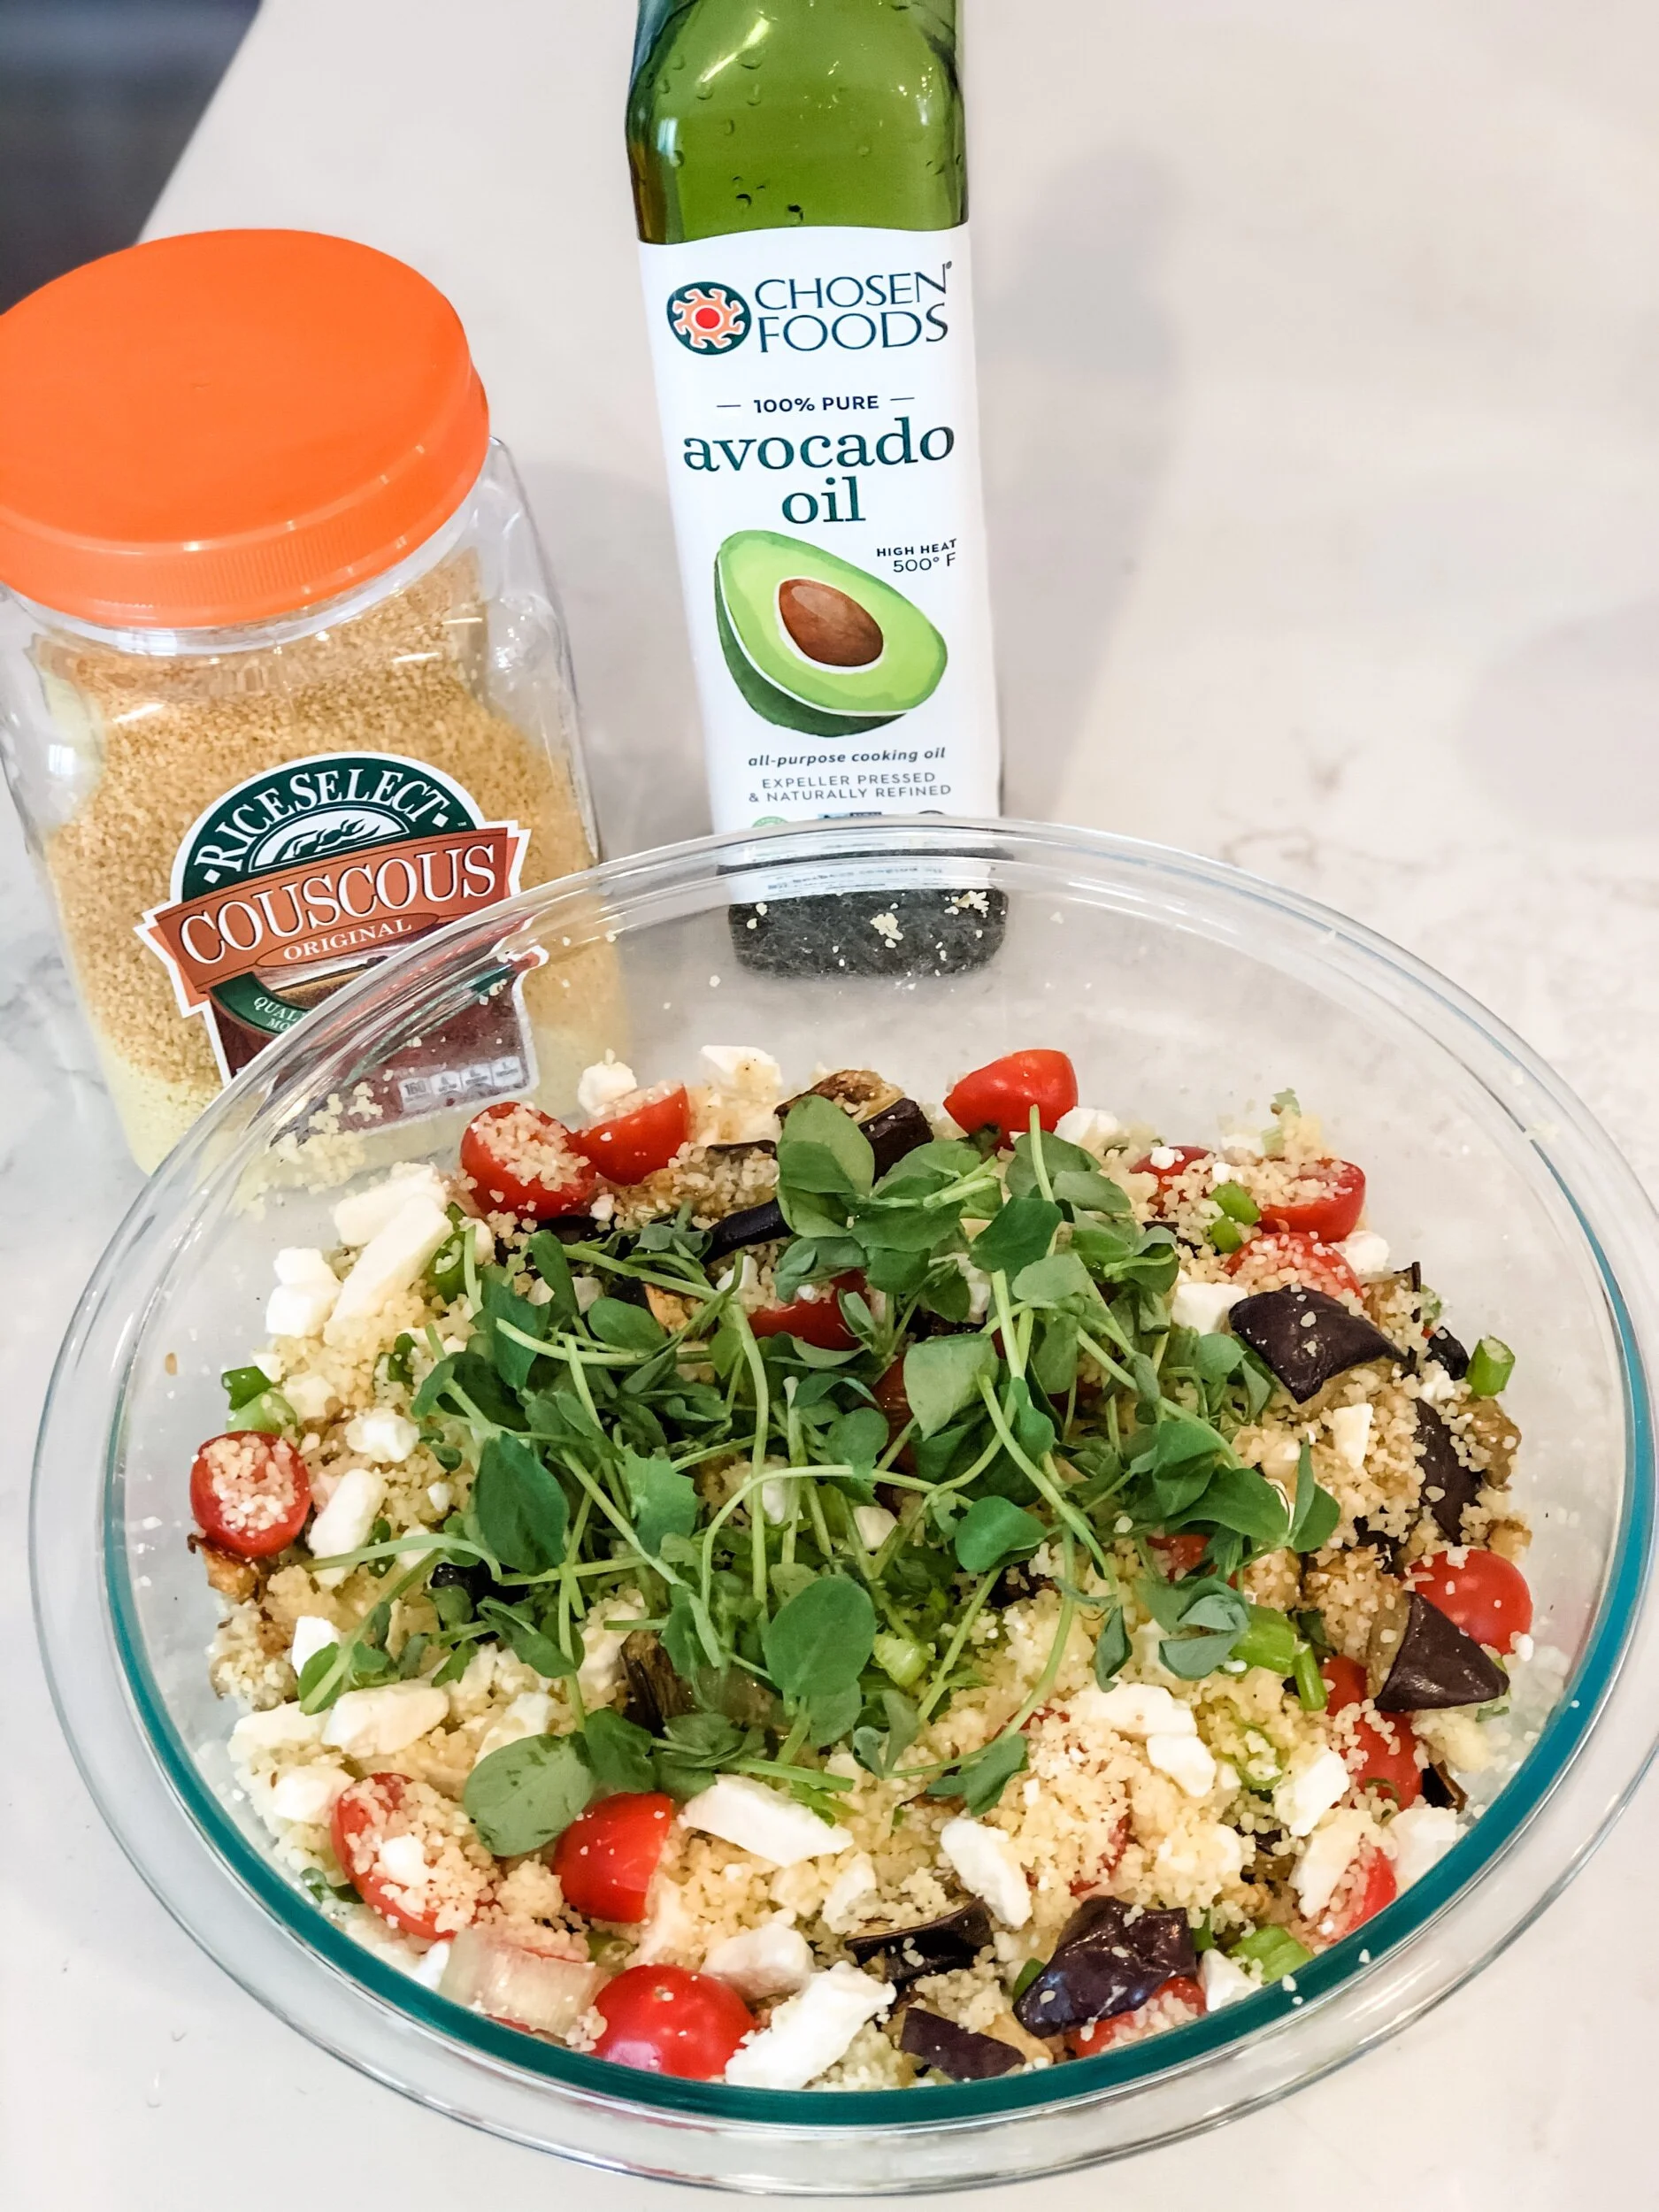
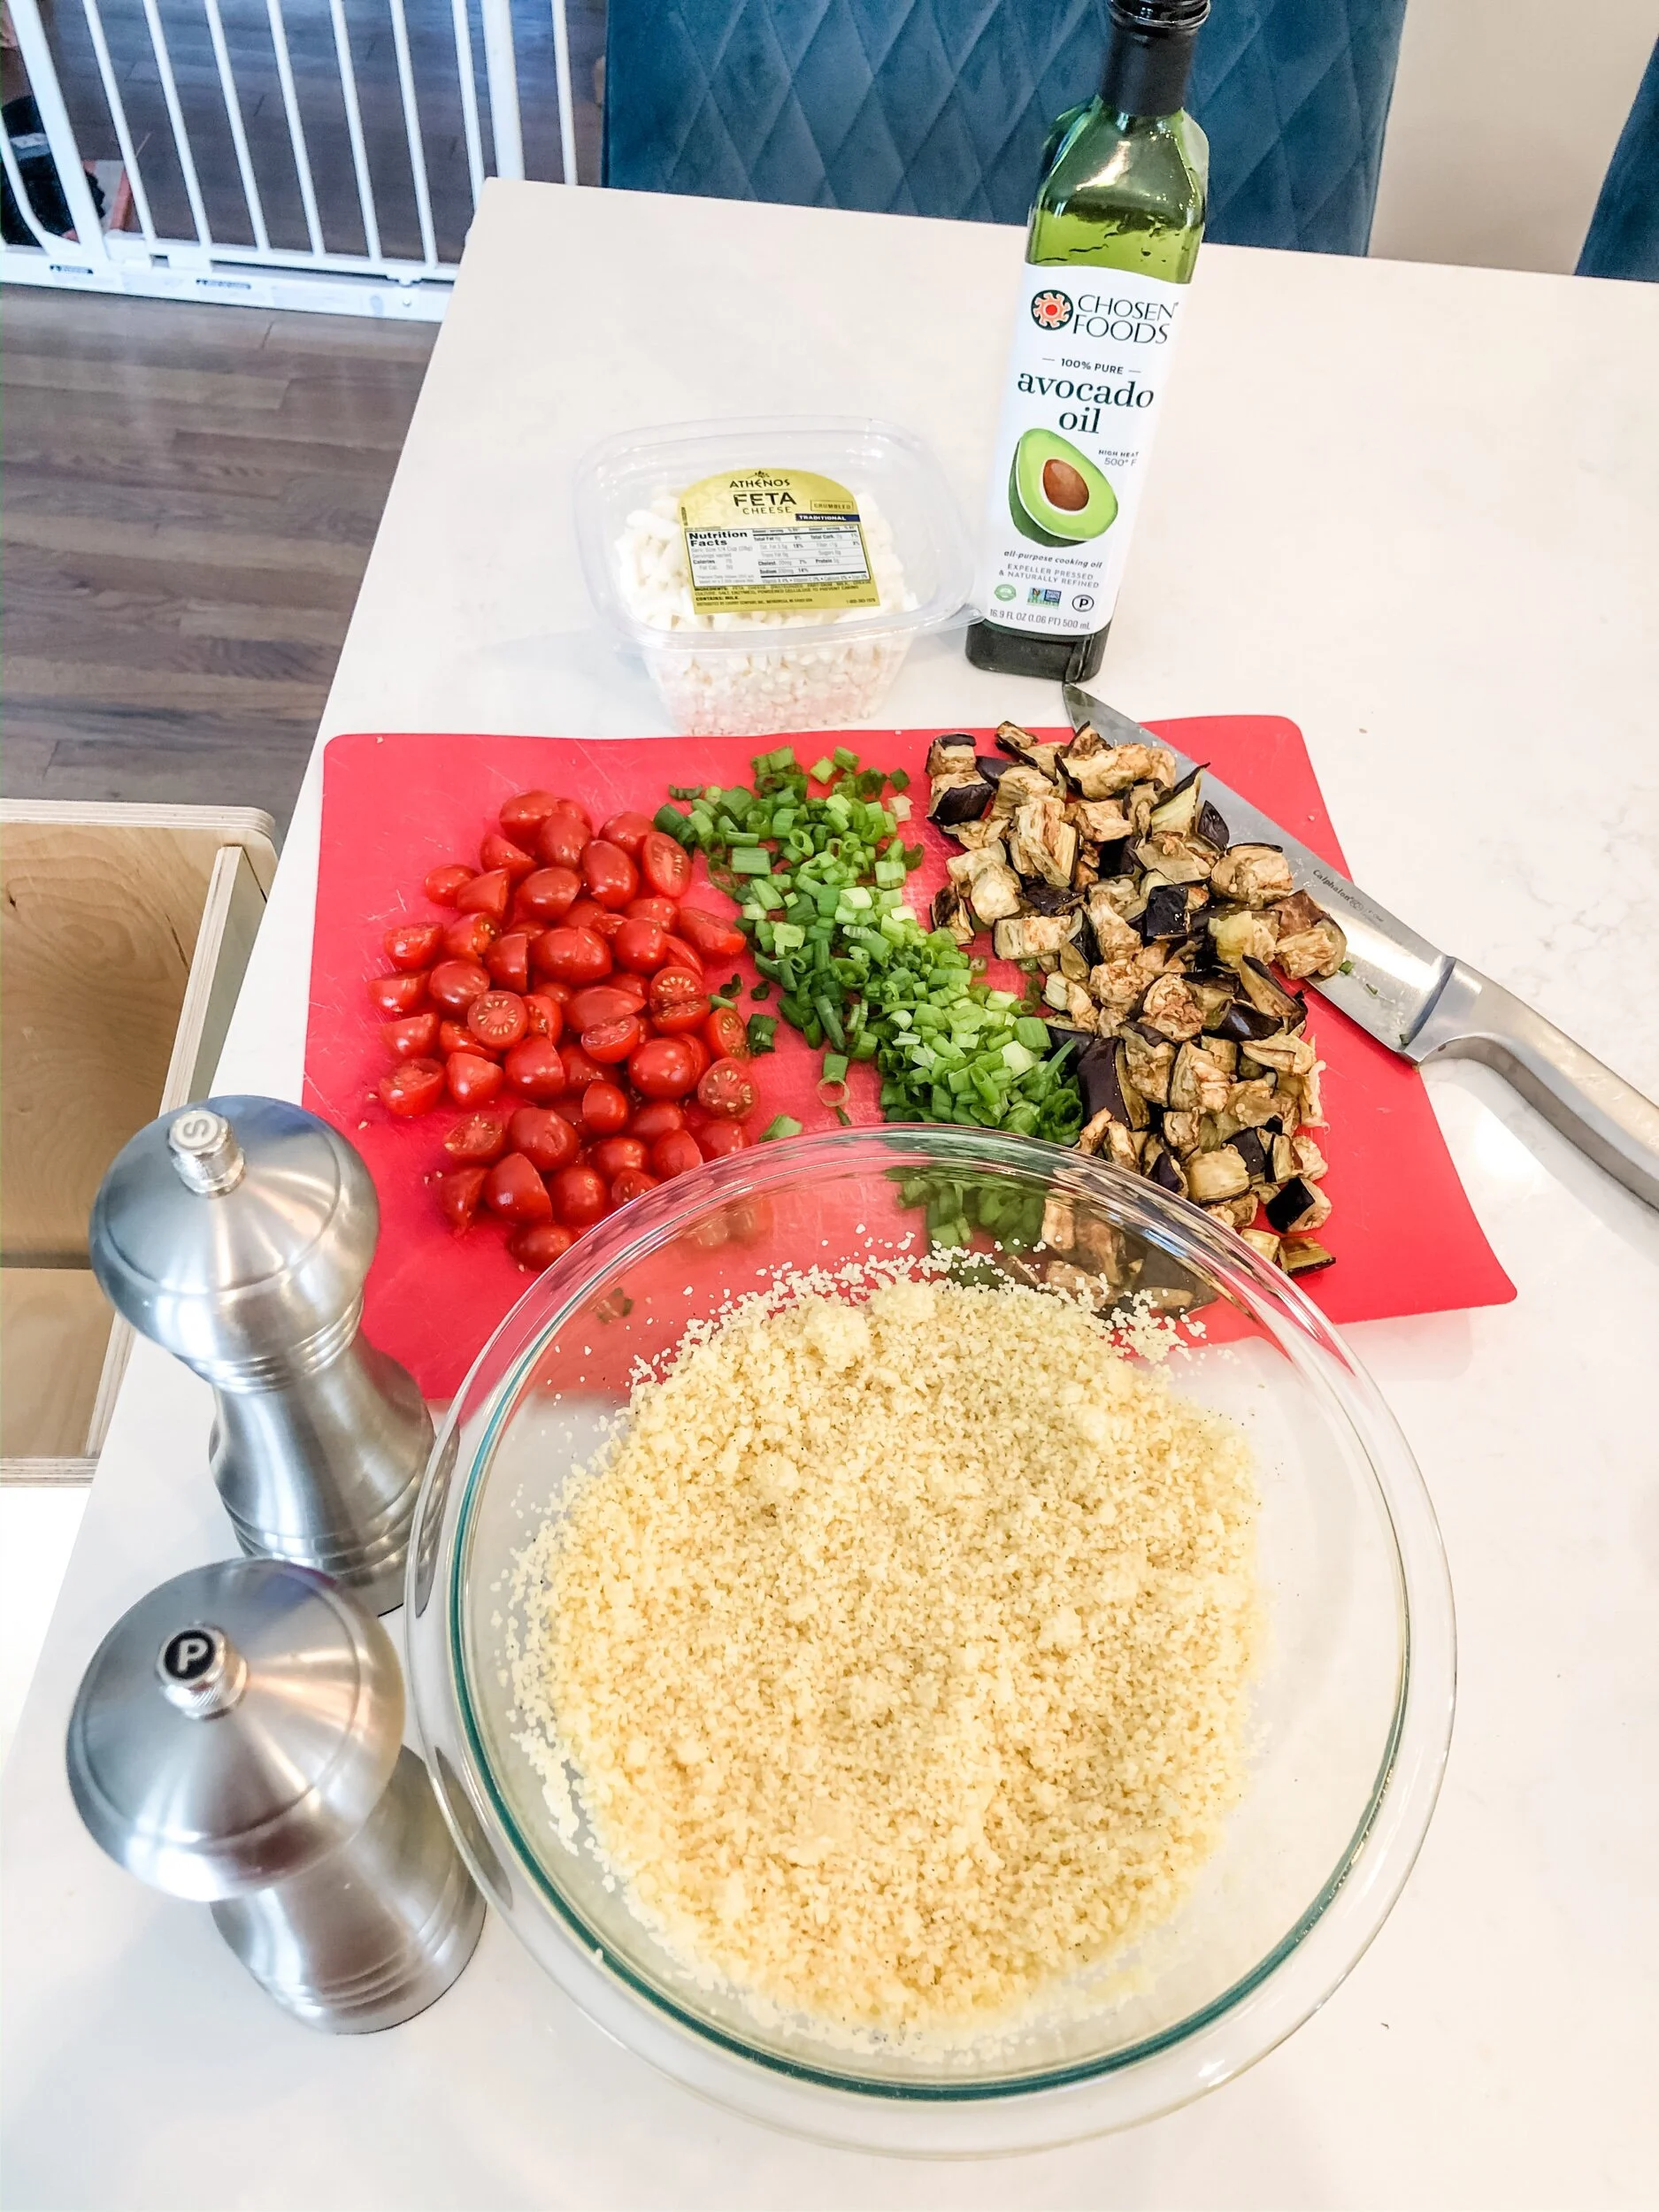
Ingredients:

  • 1 1/2 cups of couscous (I love the Rice Select Brand)

  • 1 container cherry tomatoes

  • 1 bunch scallions (more or less depending on your love for them)

  • 1 medium eggplant, cubed w/skin

  • 1/2-1 cup crumbled feta

  • 2 tablespoons avocado or olive oil (Chosen Foods is my favorite brand!)

  • 1/4 teaspoon garlic powder

  • Salt & Pepper

IMG_3651.jpeg

Directions:

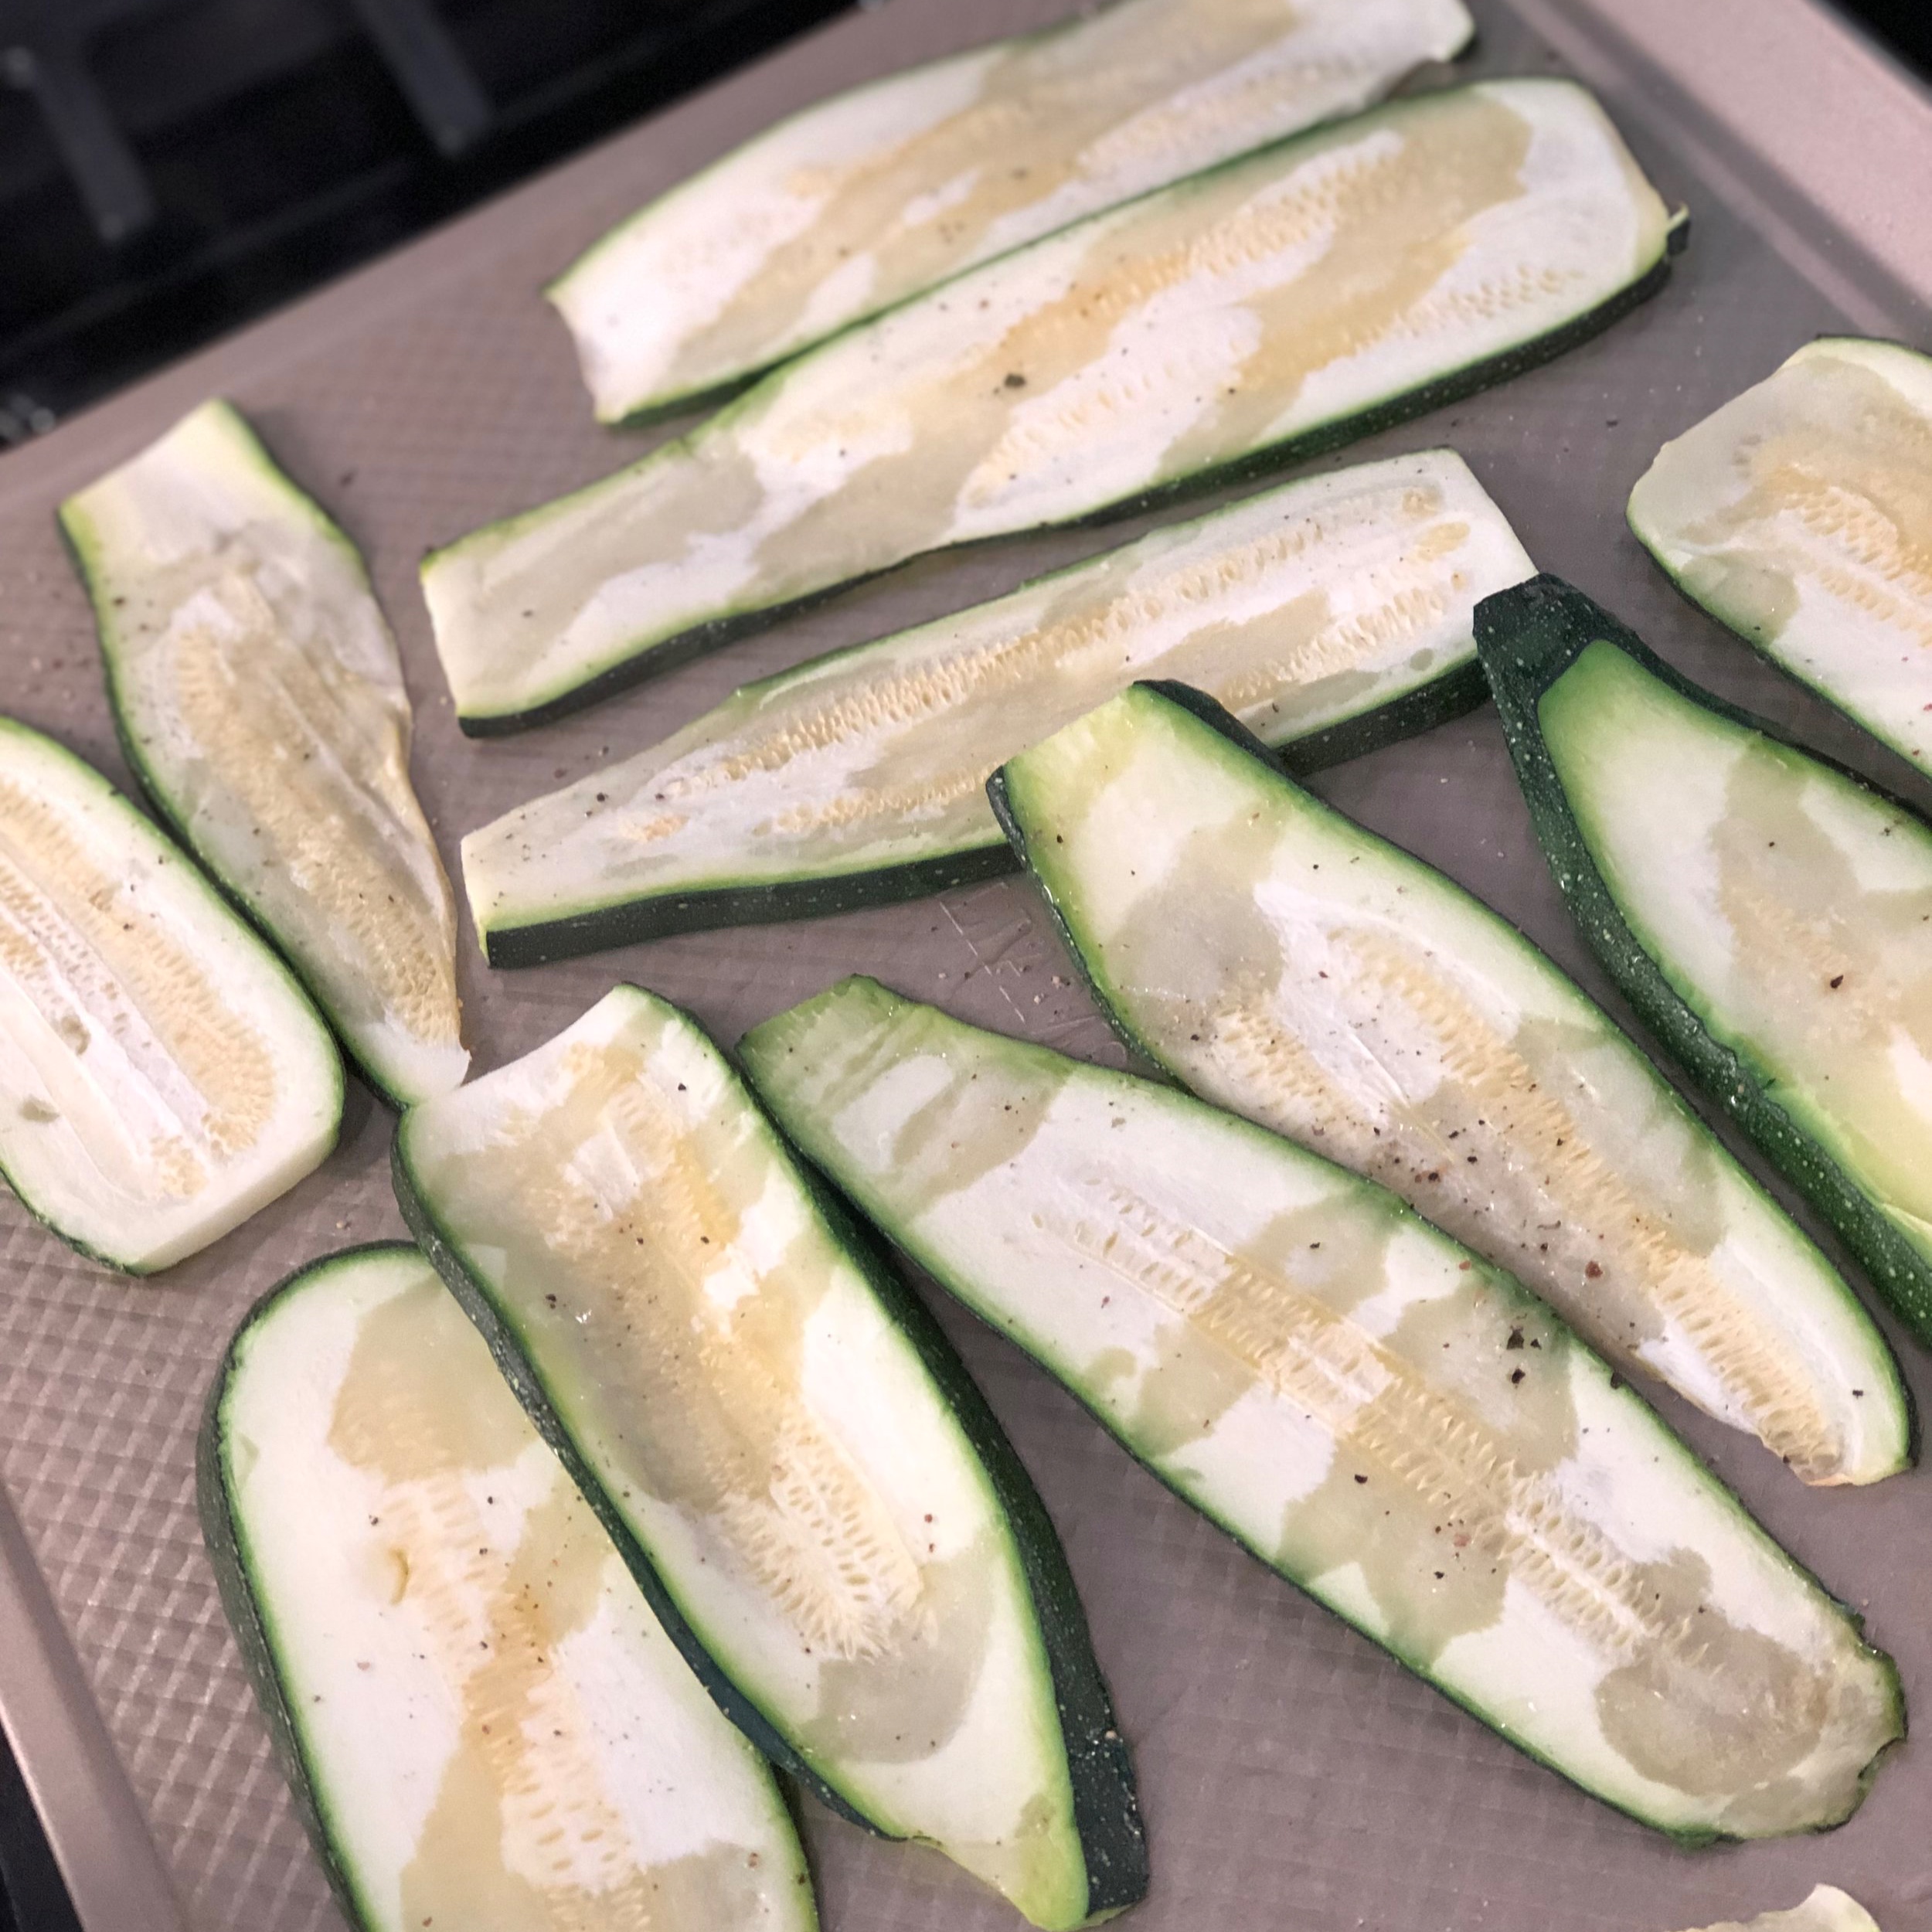
  • Wash, dry and shop eggplant into medium size cubes. Lay chopped eggplant on non-stick baking sheet (here’s my favorite kind) and sprinkle with kosher salt. Allow to sit for 30 minutes to draw water out of eggplant. After 30 minutes, blot eggplant with paper towel. Meanwhile, preheat oven to 425.

    • **I never skip this step with eggplant. It helps reduce bitterness and also excess moisture that can make your eggplant a mushy mess when cooking!

  • Place salted eggplant in oven and roast for about 20 minutes until tender. After eggplant is tender, drizzle it with your favorite oil (I love avocado oil).

  • While eggplant cooks, chop up your tomatoes (in half) and scallions.

  • Cook couscous according to your package instructions. It takes all of 5 minutes. I add a tablespoon of avocado oil to my water before cooking the couscous. Set aside in a large bowl to cool slightly after cooking.

  • Now it’s time to assemble! Fluff your couscous and add salt, pepper, and garlic powder to taste. Add in chopped eggplant and toss again. Toss in tomatoes and scallions, and you guessed it, toss again! Finally, add in the best part…the CHEESE. Make sure your couscous and eggplant aren’t too hot so that your feta doesn’t melt!

  • Once everything is tossed together you can enjoy it right away as is or add it to your favorite salad as well! This time around I topped my Mediterranean Eggplant Salad with some nutrient packed Speckled Pea Shoot microgreens from Elevated Earth, the company I talked all about last week on my Instagram stories. They added a delicious extra crunch and elevated this recipe even further!

Enjoy your first fun salad of the spring! Feel free to leave any questions or comments, below!

XOXO - Jamie

IMG_3653.jpeg

Easy Make Ahead Zucchini Rollatini

With summer here that means summer squash is everywhere! Zucchini, yellow squash, etc. are all in abundance at the farmers market, grocery stores, and maybe even your backyard. One of my favorite ways to cook is through using in season ingredients because they are fresh and also budget friendly! This easy Zucchini Rollatini has become a staple in our house and it can easily be modified with whatever you have on hand - yellow squash, eggplant, even large carrots! Your kids will also love it too and you will get your pasta fix without feeling like you weigh 20 more pounds after indulging.

The best part? You can prep this ahead of time and throw it in the oven when you are ready!

Zucchini Rollatini

Ingredients:

  • 2 Large Zucchini (or other preferred vegetable) - the wider the better

  • 1 egg

  • 2 to 2 1/2 cups of Part-Skim Ricotta - I always make a little extra and go with the 2 1/2 cups

  • 1/2 tsp. garlic powder

  • Fresh or Frozen spinach - cooked, drained, and chopped

  • 1 handful fresh oregano (or 1 tsp dried)

  • 1/2 Shredded Cup Mozzarella Cheese

  • 1/8 Cup Grated Romano/Parmesan/or any similar blend

  • Kosher Salt

  • Fresh Ground Black Pepper

fullsizeoutput_4a89.jpg

Step 1:

First, cook the spinach until it is slightly wilted. Drain, cool, and chop. Then set aside.

fullsizeoutput_4a7f.jpeg

Step 2:

Preheat oven to 375 and slice the zucchini thin (about 1/8 inch). Drizzle with olive oil and bake for 15 minutes or until soft and pliable - you want to be able to roll them without breaking.

fullsizeoutput_4a80.jpg

Step 3: While zucchini cooks, mix together Ricotta, egg, oregano, garlic powder, salt and pepper.

fullsizeoutput_4a86.jpeg

Step 4:

Add in the chopped spinach to the ricotta mixture. Check your zucchini and remove from oven when finished. Then grab your favorite tomato sauce!

fullsizeoutput_4a83.jpg

Step 5: Take your zucchini slices and lay them flat. Blot dry with a paper towel to remove excess water. Fill the slice with the ricotta mixture and roll each slice up.

fullsizeoutput_4a87.jpeg

Step 6:

Layer the bottom of a baking dish (I used 8x8) with the sauce. Place your rollatini with the ends facing down to avoid a cheesy explosion!

fullsizeoutput_4a82.jpg

Step 8:

Top off your rollatini with more tomato sauce, freshly grated cheese and the shredded mozzarella. Place in oven and bake for 30 minutes.

fullsizeoutput_4a7d.jpeg

FINAL STEP: Remove your rollatini from the oven when it is bubbling! Let rest for 10 minutes to cool and set. Then, ENJOY!

**You can complete steps 1-8 and throw the entire baking dish into your fridge until you are ready to bake it! I suggest with this method to let it sit for 5-10 minutes and come closer to room temperature before baking to ensure you don’t crack your pan or have excess water.

Now, get a fork, and DIG IN! If you have any questions, please feel free to leave them in the comments below or shoot me an email!

XoXo - Jamie

I picked up all of my ingredients for this recipe at Stew Leonards! If you haven’t been, it’s worth a trip!

I picked up all of my ingredients for this recipe at Stew Leonards! If you haven’t been, it’s worth a trip!

Shrimp & Spinach Artichoke Spaghetti Squash

A Delicious and Healthier Way to get your Spinach Artichoke "Dip" Fix

fullsizeoutput_30e1.jpeg

Ahh...Spinach Artichoke Dip.  We all love it, but no so much the calories that go with it. And even if you do make a healthier version, its not exactly a well balanced meal that you can serve on your dinner table.  

Not to worry, this recipe solves ALL of those problems and is absolutely DELICIOUS! Keep scrolling for all of the details and step-by-step directions (with pictures)!


INGREDIENTS

Estimated Time: 1 hour

  • 1 large spaghetti squash (cut in half, seeds removed) 
  • 14-16 large raw shrimp, peeled and deveined 
  • 1/3 cup Greek yogurt (I use 0% fat)
  • 2-3 oz Philadelphia Cream Cheese (1/3 fat tastes just as good as full fat)
  • 1 can artichoke hearts (15 oz), quartered, drained, and unmarinated 
  • 1/2 cup milk 
  • 1/2 cup chicken broth (can sub. vegetable broth too)
  • 2 large handfuls organic baby spinach 
  • 1/2 cup shredded mozzarella cheese 
  • 2-3 cloves garlic, minced 
  • 2 Tablespoons corn starch (or flour if you don't have)
  • 2 Tablespoons butter (can sub EVOO)
  • EVOO
  • Salt
  • Pepper 

Step 1:

Preheat oven to 425 degrees. Wash the squash and cut it in half horizontally so you have two "boats", then, remove all of the seeds.  I like to use a spoon to do this and scrape along the edges, just like you would if you were carving out a pumpkin.  Once all seeds are removed, lightly drizzle EVOO over the squash and sprinkle with salt and pepper. 

Place squash halves face down on a non-stick baking pan or one lined with foil. My favorite baking pans of ALL TIME are these Williams-Sonoma Goldtouch Bakeware.  They don't stain, nothing sticks, and they are just all around amazing. 

Step 2:

Once the oven is heated, place your squash (face down) in the oven and bake for 35-40 minutes.  This will depend on how big your squash is.  I usually start checking it around the 30 minute mark to see if it will easily "spaghetti" with a fork.  If it does, feel free to turn the oven off and let those babies sit in there until you're ready to fill them.  The nice thing about this recipe is that you can prep your other ingredients while the squash bakes.

This is how the squash should look once you "spaghetti" it with a fork and it should be fairly easy to do.  If it seems too tough, stick it back in for another 10 minutes.

This is how the squash should look once you "spaghetti" it with a fork and it should be fairly easy to do.  If it seems too tough, stick it back in for another 10 minutes.

Step 3: Prep Your Ingredients 

Start out by getting all of your ingredients ready to go...I find that recipes always go much more smoothly when you are prepped ahead of time! It reduces the risk of things burning or you missing an ingredient which can totally ruin a great meal.  

Begin by mincing the garlic cloves and chopping the artichoke hearts into quarters (make sure you've drained the artichokes).  You can usually find artichoke hearts already quartered to save some time, but if whole artichokes are all you've got, you'll just need to do a little extra labor.  Also, be careful that you aren't buying marinated artichoke hearts.  Many varieties come marinated in spices and vinegar...not saying it would ruin your recipe, but it definitely risks compromising the delicious flavors!

Just noticed Baby R making an appearance in the background! 

Just noticed Baby R making an appearance in the background! 

Step 4: Prepare the Filling 

Okay now comes the fun part...bringing everything together for that delicious, creamy spinach artichoke flavor. 

Begin by drizzling a large skillet with EVOO and heating over medium heat.  Add shrimp and dust with salt and pepper (and garlic powder) if desired.  Cook shrimp thoroughly until pink.  Set aside on plate.  (Note: I tried to use a smaller skillet and it was a PAIN later on in the process, so definitely go with a larger option).

Next, use the same skillet you cooked the shrimp in and place the 2 tablespoons of butter (or EVOO) in the skillet and add the minced garlic.  Saute over medium heat until garlic begins to brown...you'll need to watch it, it can go from not cooked to too cooked pretty quickly and burnt garlic can overwhelm your dish.

Once the garlic is sautéed, add corn starch to the pan and turn heat down to low, whisk/stir until you get a thick paste-like substance.  If you don't have corn starch, flour is always a good alternative but you may need a little extra!

Begin adding your milk and chicken broth to the pan.  Add each gradually over a five minute period, alternating back and forth between the two and stirring after each addition.  The idea is that as you continue to add the liquid, the mixture will continue to thicken and you should have a creamy sauce by the end. 

fullsizeoutput_30eb.jpeg

Next, add the cream cheese and Greek yogurt to the mixture.  Stir to allow the cream cheese to melt into the mixture.  If you have a few lumps still it is fine, just try to smooth it out as much as possible over about 3-5 minutes. 

fullsizeoutput_30e5.jpeg

After your creamy sauce is made, add in the chopped artichoke hearts and the spinach.  I like to add the spinach in gradually as it will cook down a bit as it heats and your pan will have more room.  That way you can prevent an unwanted spill-over onto your stove (speaking from experience here...)

If your sauce seems really runny, feel free to add a little more corn starch and stir vigorously for a few minutes to help thicken it back up.  Sometimes if your spinach has a lot of water or your artichokes weren't well drained, it can cause for a runnier sauce than you'd like. 

uNulwxM6SgOA7WCYQx8%aQ.jpg

Finally, remember those shrimp sitting to the side?  It's time to add those back into the pan and stir into the spinach artichoke mixture.  Heat for about 3-5 more minutes on medium heat stirring constantly.....you don't want your shrimp to get too tough from overcooking. This is also a good time to give your sauce a taste to see if it needs any salt/pepper and add those accordingly. 

OMG....this looks SO GOOD I want to make it again just writing this.

OMG....this looks SO GOOD I want to make it again just writing this.

Step 5: Assemble the Squash 

Now comes the time to assemble everything!  Your squash should be done so take that out of the oven and "spaghetti" it with a fork.  If its not done, see the directions at the beginning of this post and just pop a lid on your sauce mixture to keep it hot.

Next, gradually spoon in the mixture to the squash stirring after each addition so you incorporate the "spaghetti" with the spinach artichoke mixture.  Make sure you divvy up your shrimp evenly here so nobody gets a squash just full of the spinach/artichoke mixture or vice versa.


Step 6: Top it Off!

Set your oven to broil.  Then, take that mozzarella we set aside in the beginning and sprinkle it on the top of the filled spaghetti squash boats.  You can use as much or as little cheese as you want here...obviously, I opted for a lot because I love cheese.  

Stick your cheese topped squash back into the oven for about 5 minutes or until the cheese begins to bubble.  Depending on your oven, it will likely be less than 5 minutes.  Watch that it doesn't burn...broilers can make something go from good to bad pretty quickly.

When you remove the squash from the oven, top it with fresh parsley and grated parmesan if you want (I skipped this step because I was out of it...a sin, I know).

FINAL STEP: Plate it!

Okay now all that is left to do is plate this deliciousness and serve it to someone you love! If you used a pretty big squash, don't be surprised if you can't finish the entire thing in one sitting, but that is totally fine because this dish is SO good as a leftover! 

Also, this can totally be adapted to meet any dietary restrictions.  If you are dairy free, skip the butter and milk and opt for almond milk and a dairy free cream cheese and shredded mozzarella substitute.  Also, if you don't like shrimp, chicken always works too! 

IMG_1779.jpg

Once you've filled yourself up....there is always room for dessert right?!

We headed to our favorite Italian bakery/cafe in Westchester, Boiano Bakery for some after dinner treats.  If you're in the area, you MUST check it out!

IMG_1784.jpg

Thanks so much for stopping by!  I hope you enjoy this recipe from my kitchen to yours.  If you have any questions leave them in the comments below! 

XoXo - Jamie